Herb gardens are very popular and for good reason. Perhaps one of the most appealing reasons people have herb gardens is because herbs add delicious flavoring to food and they are so easy to grow. Other popular reasons for growing herbs is their pleasing fragrances, medicinal purposes, making teas, and their use as decorative plants.
Planning Your Herb Garden
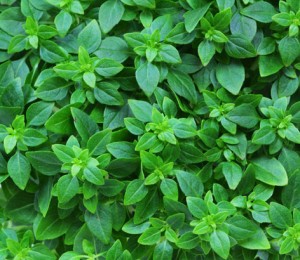
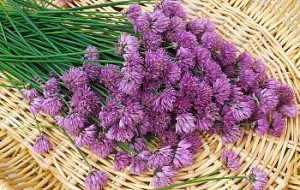
 The first step is to plan your garden and choose which herb plants you want to grow. With such a large variety of herb plants available to choose from, you can narrow it down by deciding exactly what purpose your herb garden will serve. Do you plan to grow herbs for seasoning food? If so, some herb plants you might consider are basil, chives, marjoram, mint, parsley, rosemary, sage, tarragon, and thyme.
You will also want to consider whether you want to plant annual herbs, perennial herbs, or biennial herb plants. Annuals are plants that complete their life cycle in one growing season. Biennials are plants that take two years to complete their life cycle and perennials grow for several growing seasons. In addition, you will have to consider the growing conditions favored by certain herb plants.
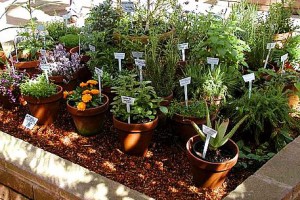
Next you will need to decide whether you want to have a container herb garden, grow your herb plants in the ground with other plants, or a combination of both. Growing herbs in pots or containers is fairly easy, but you will need to choose the proper size pot or container to allow the roots to grow. When mature, herb plants have a root system that is slightly larger than their top growth so you will need to choose your pot or container accordingly.
As a general rule of thumb, each of your herb plants will require at least one gallon of potting mix. If you choose smaller pots or containers that only hold two gallons of potting mix, it will be able to support two herb plants. The larger the container, the more potting mix it can hold, and the more plants it can support. Regardless of which size or type of pot or container you plant to use, it must have adequate drainage holes.
|
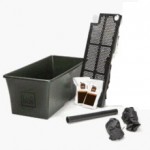
Click HereFor More Information About The Green Earth Box Ready-to-Grow System |
Click Here for Common Herbs – Growth Characteristics for more information about the size common herb plants reach at full maturity, their hardiness, growth category, and other important info.
Whether you plan to have a container herb garden or grow your herb plants in the ground, they will do best in a soil that is fertile, has a texture that allows the roots to easily penetrate, and drains well. To test ground soil for good drainage, pour water on it and if the soil stays completely saturated, it is not draining well and will not support healthy plant growth. To fix this type of drainage problem and improve the soil, dig a hole that is wider and slightly deeper than the depth required by the plant. Put a layer of crushed rock in the hole and then replace the soil with a good potting mix.
Planting Your Herb Plants
You have the option of starting your herb plants from seeds or purchasing plants from a garden center or nursery. It is less expensive to start your plants from seeds, but it does take more effort and more time. And then there are some herb plants that have to be purchased as plants because they may not produce the desired characteristics if you try to start them from seeds.
 Some herb plants, such as annuals and a few perennials, can be grown by direct seeding. This simply means that you will sow the seeds in the pots or ground where they are intended to grow, rather than having to start them in seed pots and then transplant them. When you buy seeds, the packets contain all the information you need about planting such as, when to sow, how deep, how far apart to plant the seeds, and how long until germination. Because some herb plants need more room to grow than others, it is important to follow the directions on the seed packet with regard to spacing.
Once you have your seeds and have followed the planting directions on the packet, it will be important to keep your seeds moist until they germinate. To help preserve moisture, you can cover the planted seeds with a layer of straw or cover them with a light horticultural fabric. Once the herb plants have grown to a size where they are easy to work with, you will need to thin them according to the planting directions and continue to water them on a regular basis until their growth is well established.
Because of the uncertainty of the weather in the beginning of the season, such as cold snaps and heavy rains, you may opt to grow your seeds in containers first and then transplant them to their permanent growing habitat. Controlling the conditions by growing seeds in containers allows you to avoid the problems uncertain weather conditions may pose to young plants.
There are some herb plants that do not transplant well, such as anise, coriander, dill and fennel, so they will have to be direct sown rather than started as seeds.
To sow seeds in containers, start with 4-inch plastic containers with holes on the bottom and fill them almost to the top with a good, moist potting mix. Add the seeds and keep them wet and in a warm place out of direct sunlight. The easiest way to water them is to use a spray bottle and to help keep them moist, you can place the containers in plastic bags. Even in plastic bags, however, you will need to keep up with watering to make sure they stay moist. Use a water soluble fertilizer diluted to a half or a quarter of the ordinary rate once a week to feed the plants.
Once your seeds have germinated, you should place them under lights for a minimum of 12 hours a day. At this point your plants should be watered by putting them in a shallow tray filled with water so the plants can absorb the water from holes in the bottom of the container. Once the soil is moist, remove the containers from the tray and repeat whenever the soil begins to become dry.
Once your plants have developed their first true leaves, you will need to transplant them into larger containers so they can continue to grow. Fill the new containers with fresh potting mix and use care when removing the seedling from the old container. You can hold it by a leaf and use a sharp pencil to remove it, taking care not to disturb the roots or any soil that is attached to them. Poke a hole in the soil of the new container, insert the seedling into the hole and make sure to bury the roots. Put the containers under lights again continue to feed and water them.
Once the seedlings are ready to go outside, you need to acclimate them to outdoor conditions. Start with setting them outside in an area that is protected from wind and direct sunlight for a few hours a day, gradually increasing them to full exposure of a period of several days. After they have been acclimated to the outdoors, your herb plants can be planted in their permanent growing area.
Water the containers and allow them to drain before you transplant your plants. When removing them from the containers, take care to disturb the roots as little as possible. Take the root ball and gently loosen the roots then place the plant into a hole that is slightly larger than the root ball and deep enough so that the top of the root ball is even with the intended soil level. Fill the hole halfway with soil, water the root ball and let it drain and then fill the hole with the rest of the soil. Push gently around the stem of the plant to firm the soil. Make sure your new herb plants receive enough water during the growing season to thrive.
Harvesting Your Herbs
 Depending on the type of herb plants you grow, the harvest may include one or more parts of the plant. With many plants you will be harvesting the leaves, however, there are cases where you can pick flowers, seeds, and even roots. The time to harvest is not determined by a specific day or month, but rather, by the growing condition of your plants. The leaves of the plants contain the optimum amount of essential oils and yield the greatest flavor when the flower buds first appear, but before they fully open. Mints, on the other hand, are best harvested when the spikes are in full bloom as this is when the leaves have the most essential oils.
The best time to harvest your herbs is in the morning, just after the dew has evaporated from the leaves and before the sun gets hot. Make sure you harvest on a dry day. It’s important to use baskets or containers that allow for good air circulation when harvesting. Don’t use plastic bags because they can cause the herbs to deteriorate rapidly and be sure to only harvest as much as you can conveniently dry at any given time. Perennial herbs can be cut back to about half their height, and annuals can be cut down to a few inches.
How To Dry Herbs
Once you have gathered your harvest, take the plants and wash them in cool water. Spread them out on a towel and gently pat them dry. Some herbs, such as basil, dill, mint, sage, and tarragon, require the leaves be stripped from the stems before drying. Other herbs that have smaller leaves can be dried right on the stems. Some examples of these herbs are rosemary, oregano and marjoram.
There are several methods to drying herbs – bag drying, tray drying, dehydrator drying, microwave drying and freezing. The National Center for Home Food Preservation has detailed information about drying herbs properly and you can also find information about how to dry herbs and about preserving them at the Herb Gardening website of the University of Illinois Extension.
For herbs that do not dry well at home, use the freezing method to preserve them. After harvesting and washing them, blanch the herbs in unsalted boiling water for 50 seconds. Use ice water to cool them quickly then blot them dry, package and freeze. You can freeze dill, parsley, chives and basil without blanching first.
Given the ease of growing herb plants and the opportunity to control the growing conditions of the herbs you use, it’s no wonder that every year herb gardens are becoming more and more popular!
Related Articles:

 The Green Earth Box Ready-to-Grow System is the new secret way to grow larger, higher-quality flowers, herbs, vegetables and plants. Great for container gardening or seed starting! Grow vegetables, fruits, herbs and flowers with EarthBox. Our Green Earth Box System includes 1 EarthBox unit, 1 Aeration Screen, 1 Water Fill Tube, 2 Fitted Covers, 4 Casters, 20 oz. Bag of 7-7-7 Fertilizer, and 16 oz. Bag of Dolomite w/ Trace Elements. All durable plastic components are UV stabilized. Holds 2.0 C.F. of Potting Mix, Holds 3 Gallons of Water, Product Dimensions 29L x 14W x 11H, Integrated Caster Sockets, One-Year Warranty, Instruction Sheet.